
Pinstripe Wood Nursery Wall
I love this feature wall. It went so smoothly and turned out exactly as I envisioned. That. never. happens. EVER! If you want to replicate this wall or something similar, read on and I will walk you through the process. I also have a highlight on my instagram profile if you want to see clips of the process as well.
The first step is to plan out the wall. Take the time to do this accurately and the rest of the project will go smoothly.

Before You Start:
Measure the wall accurately and draw it out on paper. You can mock it up on your phone like I did above too LOL!
Decide if you are going to keep the baseboards or replace- this will be determined on what kind of wood and the thickness you will use for the pinstripes. I used 1 1/8 pine lattice trim. It is very thin-1/4 inch thick, and allowed me to leave the baseboards in .
Decide how tall the stripes will be and if you are adding anything else above it. On my wall I used a 1x6 horizontal board as a chair rail. I wanted a ledge, so I also was going to top it with a 1x4 stained piece on top of the painted chair rail. I chose 4 feet tall for the lattice pieces because that was maximizing the 8 foot length of the boards.
Consider what is going on the wall. In my case, a crib and eventually a dresser will be on this wall. I wanted the ledge to be high enough to clear the crib without the possibility of bumping your head, but leaving enough room for wallpaper and art to be above the ledge.
Patch any holes or imperfections first. I have fairly flat walls and had previously done some drywall repair.
Don’t get discouraged if you feel that the math is overwhelming, check out the website www.inchcalculator.com and you can enter your design and get measurements back in a few clicks!
As a disclaimer... the BEST most efficient way to do this is to paint the base wall previous to hanging the stripes. I didn't do this because I had one work day sans kids and wanted to use it for the math/construction/needs concentration part. I didn't have a color picked yet so I just started. Painting took longer because of the cutting in all the seams. It wasn't horrible, but definitely could have been faster painting first.
Supplies Needed:
11 pine lattice 1 1/8 x 8ft (9 for the stripes and 2 to reach from corner to corner above the base)
2-1x6x8ft primed pine boards
1x4x11ft maple board for ledge
Nail Gun or liquid nails
level
pencil
stud finder
paint brush and small roller
paint- I used Sherwin Williams Super Paint in Eclipse mixed at 110%
Tutorial:
Mark all of your studs across the wall.

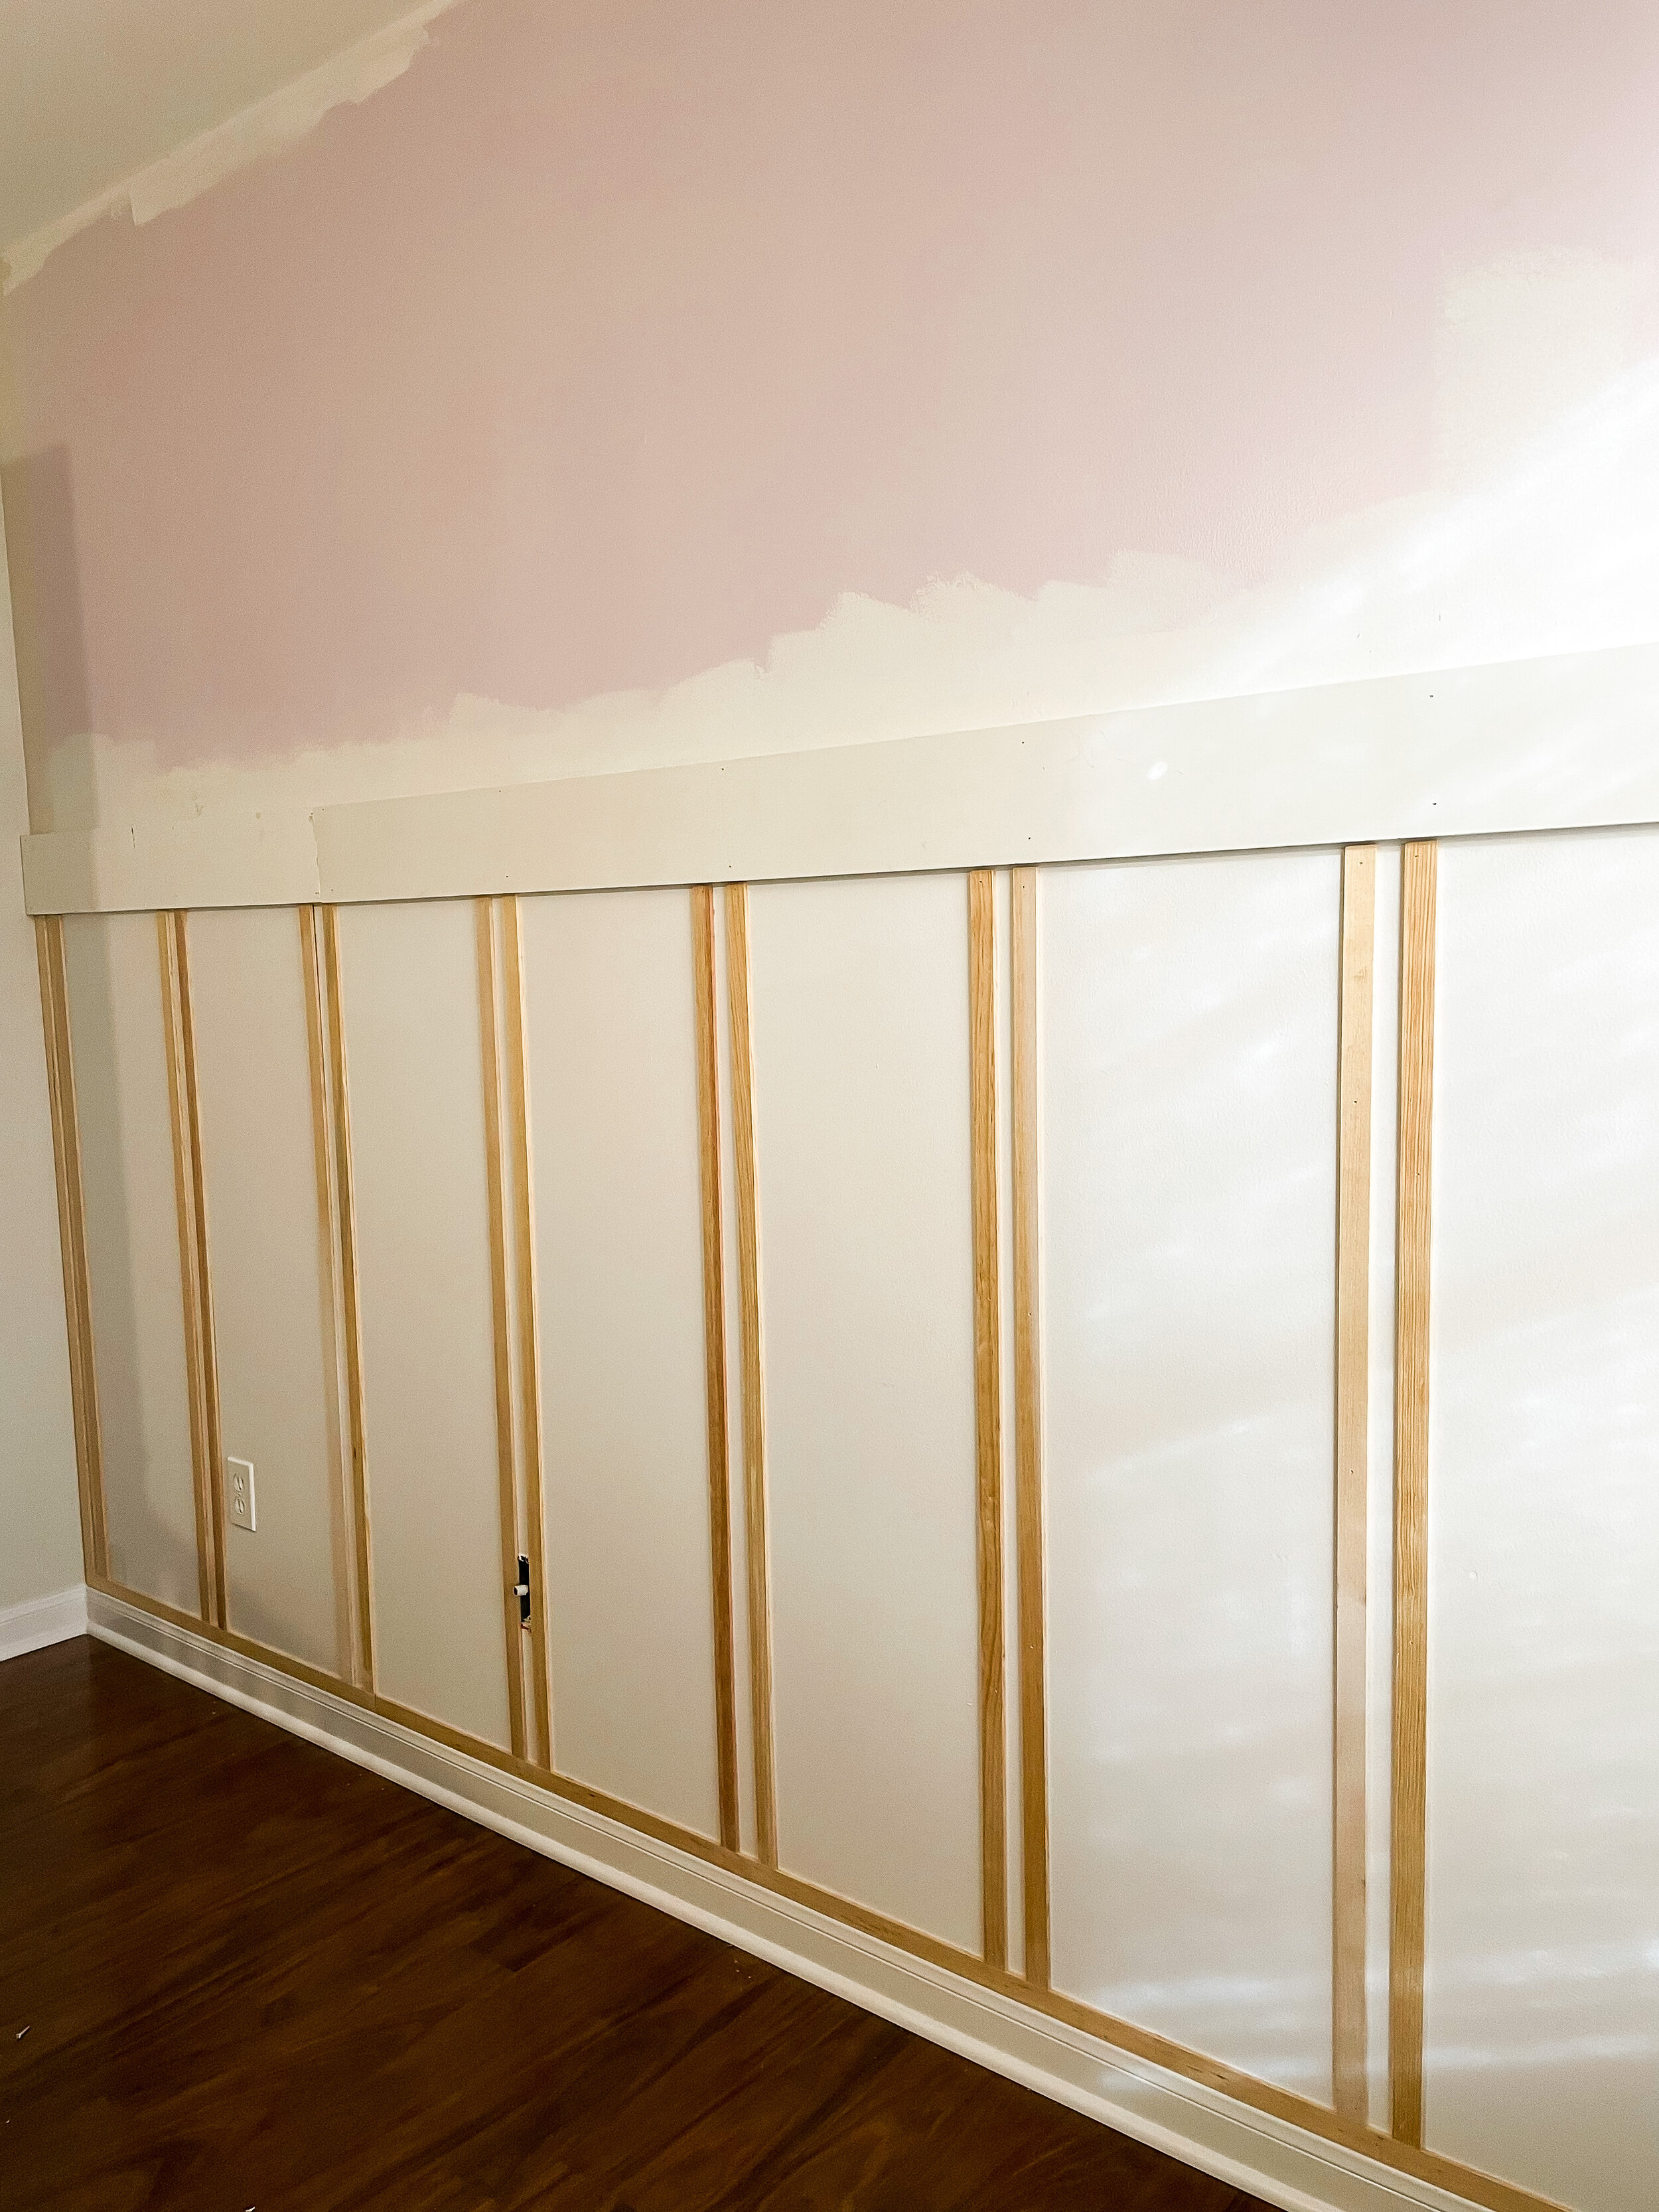
Add the lattice piece above the baseboard with nail gun. I used 1 inch nails. This trim is extremely light weight. I alternated angles with the nails to give it grip where there aren’t studs.

Next I cut the 9 sets of lattice pieces to 4ft and laid them against the wall to double check my measurements.
I made a template with a piece of paper measuring 12 11/16 to put between the stripes to make measuring quick. (This is what I calculated for the distance between the stripes) At this point if you are going to run into any outlets or switches, consider how you will deal with those. I lucked out and didn't have any problems.

Nail in all of the wood stripes make sure to check they are level running vertically and make sure they are measuring the width from side to side that you calculated (3 1/4) in multiple places. The lattice is flexible enough to manipulate it a little if needed. I put 4 nails in each board.

Using 2 inch nails I added the 1x6 into the studs. Make sure this piece is level as well.

At this point I patched all of the nail holes with wood filler and caulked any gaps on the wall and below the 1x6. I did not caulk the length of the stripes. The wall hugged them tight but if you have space, then it needs to be done. (I am putting up wallpaper so I waited to put on the ledge until that was done incase I needed to hide any imperfections.

After the wood filler and caulk dry, sand the filler, vacuum up and wipe down any dust.

I taped off the side walls and under the baseboards and painted the wall. It took a few coats and touch ups to get it all cut in. I used a 2 inch brush and a small roller to smooth everything out.

The final steps were to add the wallpaper and then the wood ledge. Measure twice, cut once. I found this maple board at Home Depot. It's really important to make sure this is secured down. I used wood glue and 1 1/4 inch nails to put it into the top chair rail board.

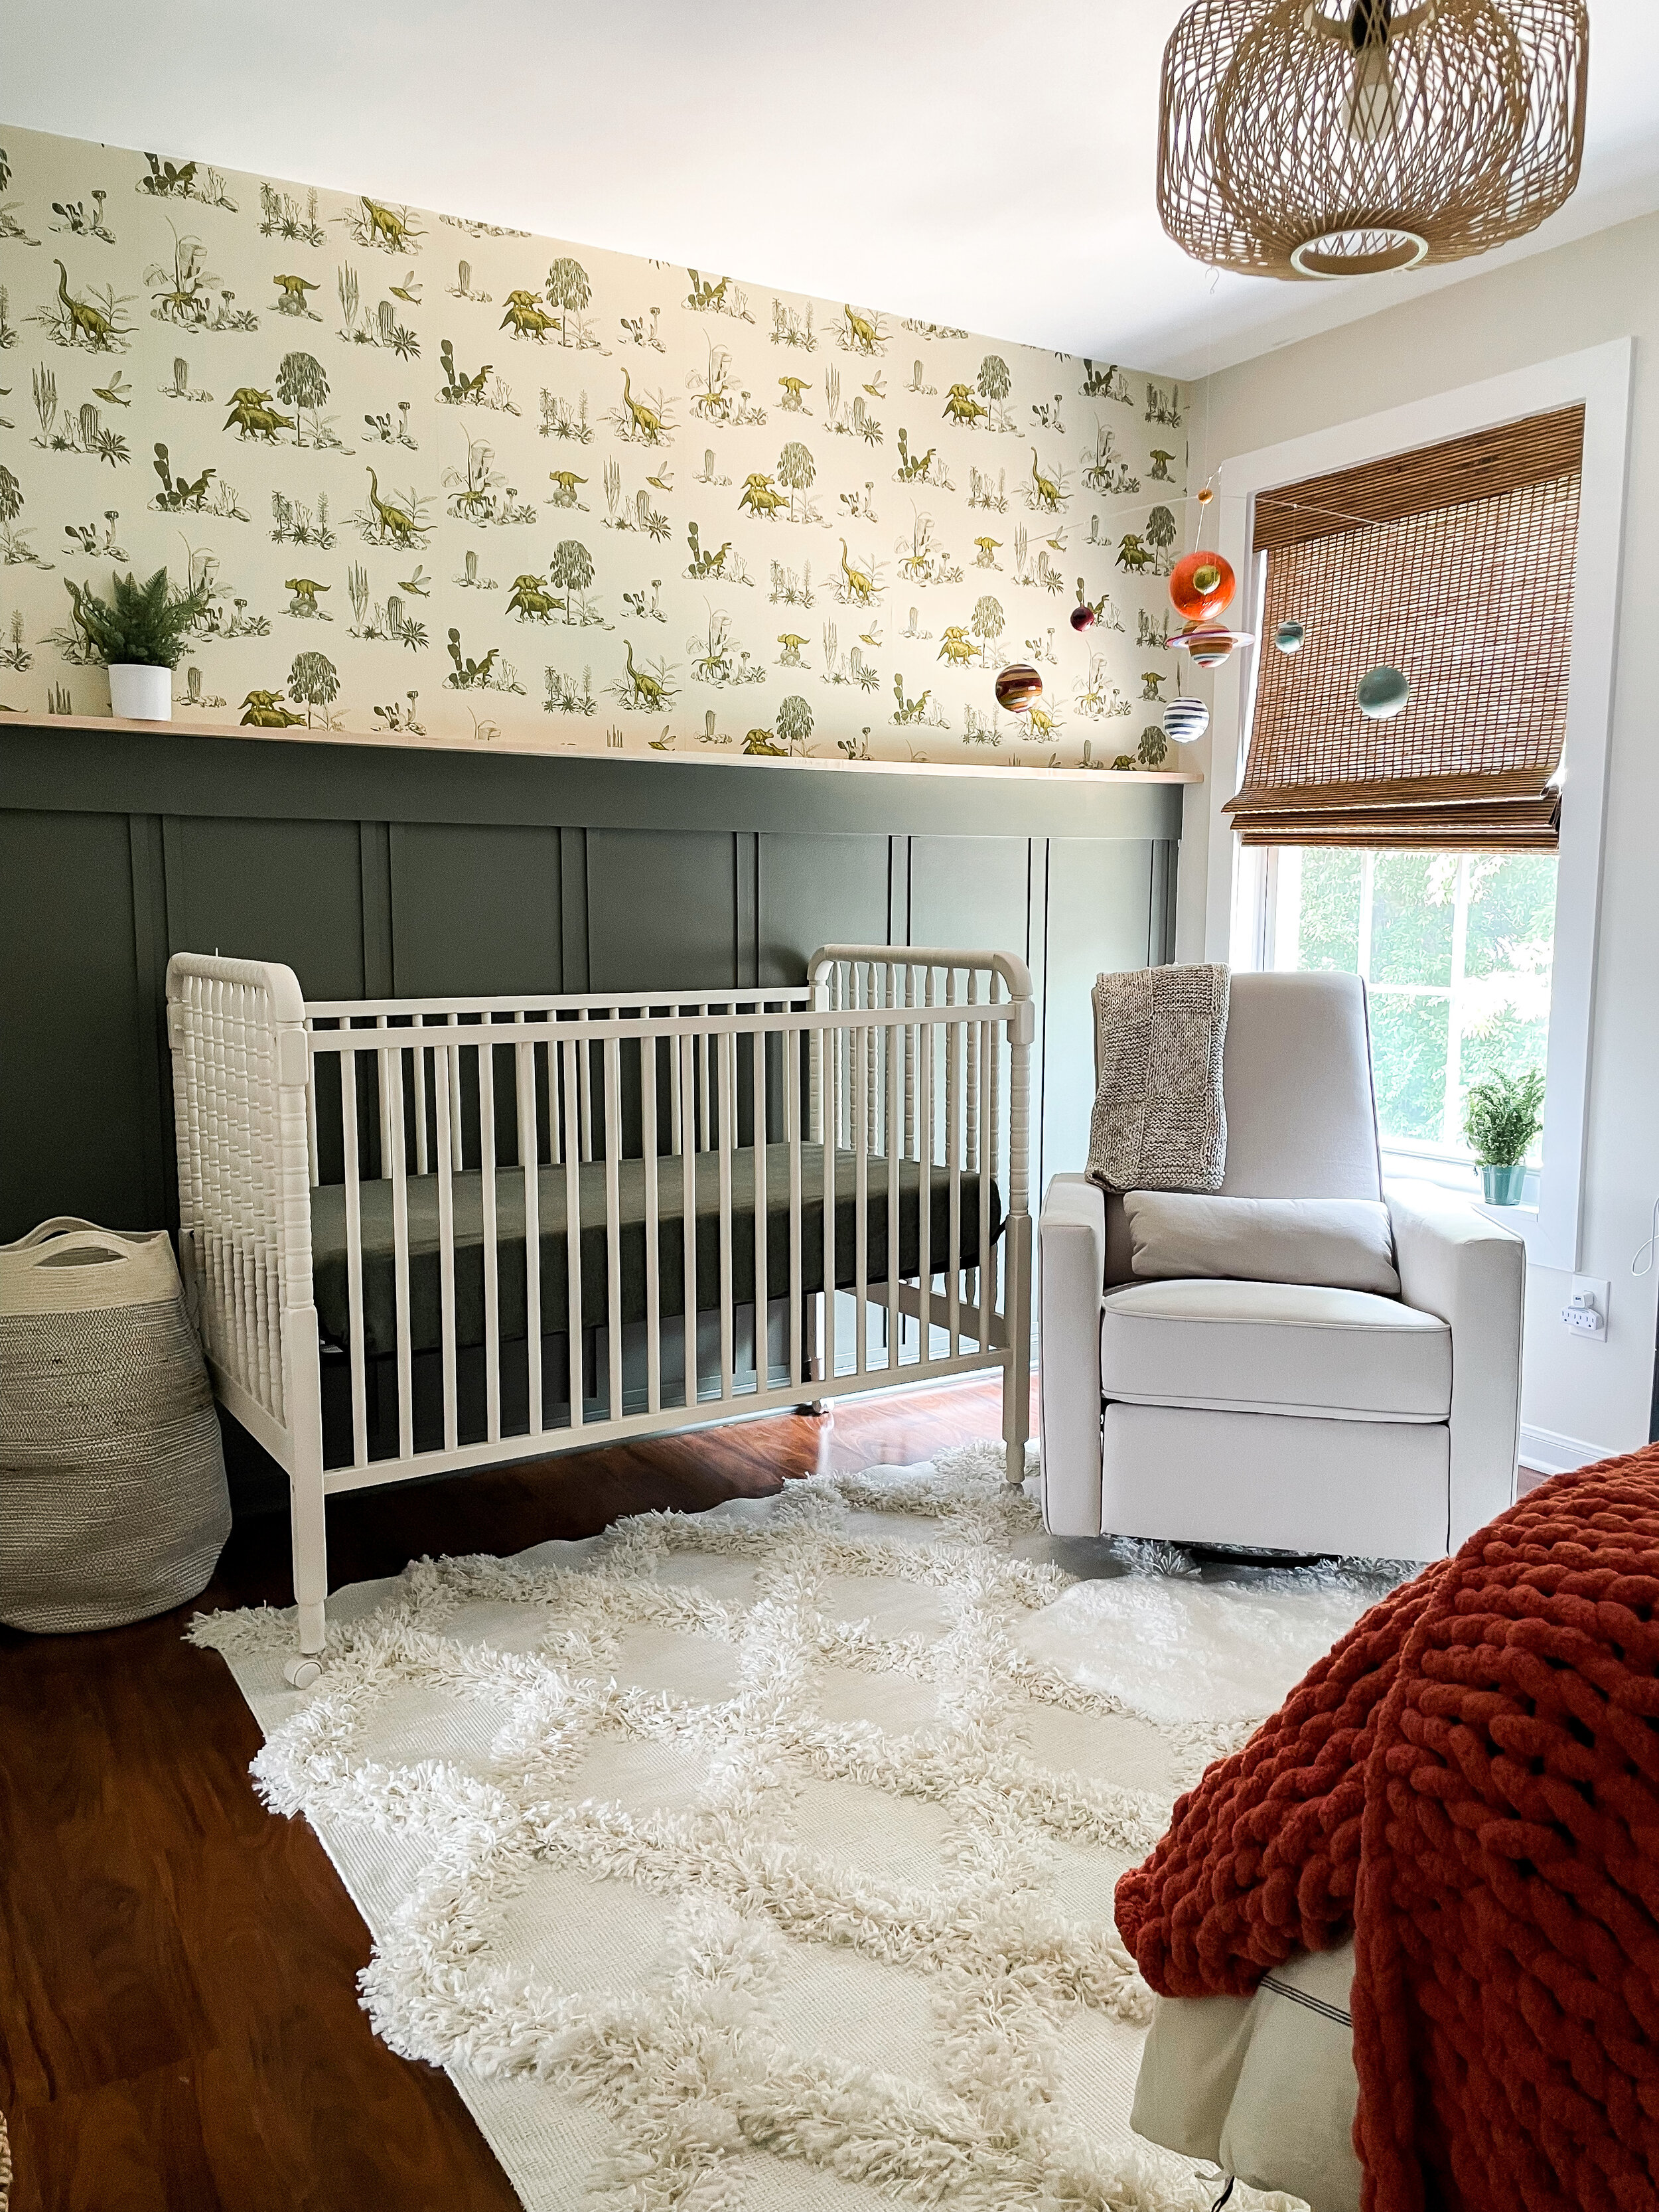
Here is the final look. I love the way this turned out. It was a weekend type project that made a big impact on the otherwise neutral room. (If I put anything on this ledge I will secure it to the wall or ledge because it is over a baby crib. )

Source List:
Paint- Sherwin Williams Eclipse mixed @ 110%
Crib
Rocco loves it and approves!
